Step-by-step guides for inventory, shows, packing, shopping, budget, Task Boards, hire sheets, team invites, import/export, Props Store hire, and mobile — written against the real app labels and workflows. Android at launch; iOS in the pipeline.
Every section starts with the business need, then walks through the screens, fields, and common pitfalls. Select a show in the app before props, packing, shopping, budget, boards, hire sheet, or import.
Get Started
Why this matters
Theatre props work fails when knowledge lives in someone’s head, a buried spreadsheet, or a WhatsApp thread. Get Started puts you into a show-scoped workspace so inventory, tasks, packing, and crew share one source of truth from day one.
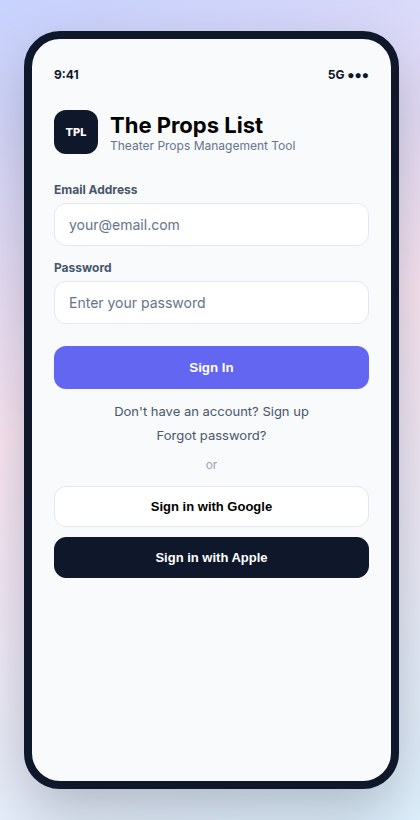
Sign in, or choose signup / complete signup if you are new
Use forgot password / reset password if you need to recover access
If you were invited, open the invite link (/join/…) so you land on the right show
Choose your plan
New accounts must pick a plan on Choose your plan (/choose-plan) before the setup wizard:
Pick Free to go straight into onboarding, or Starter / Standard / Pro to continue to checkout
Optional: enter a discount code before a paid checkout
You can change plan later from Profile → Subscription
Onboarding wizard (web)
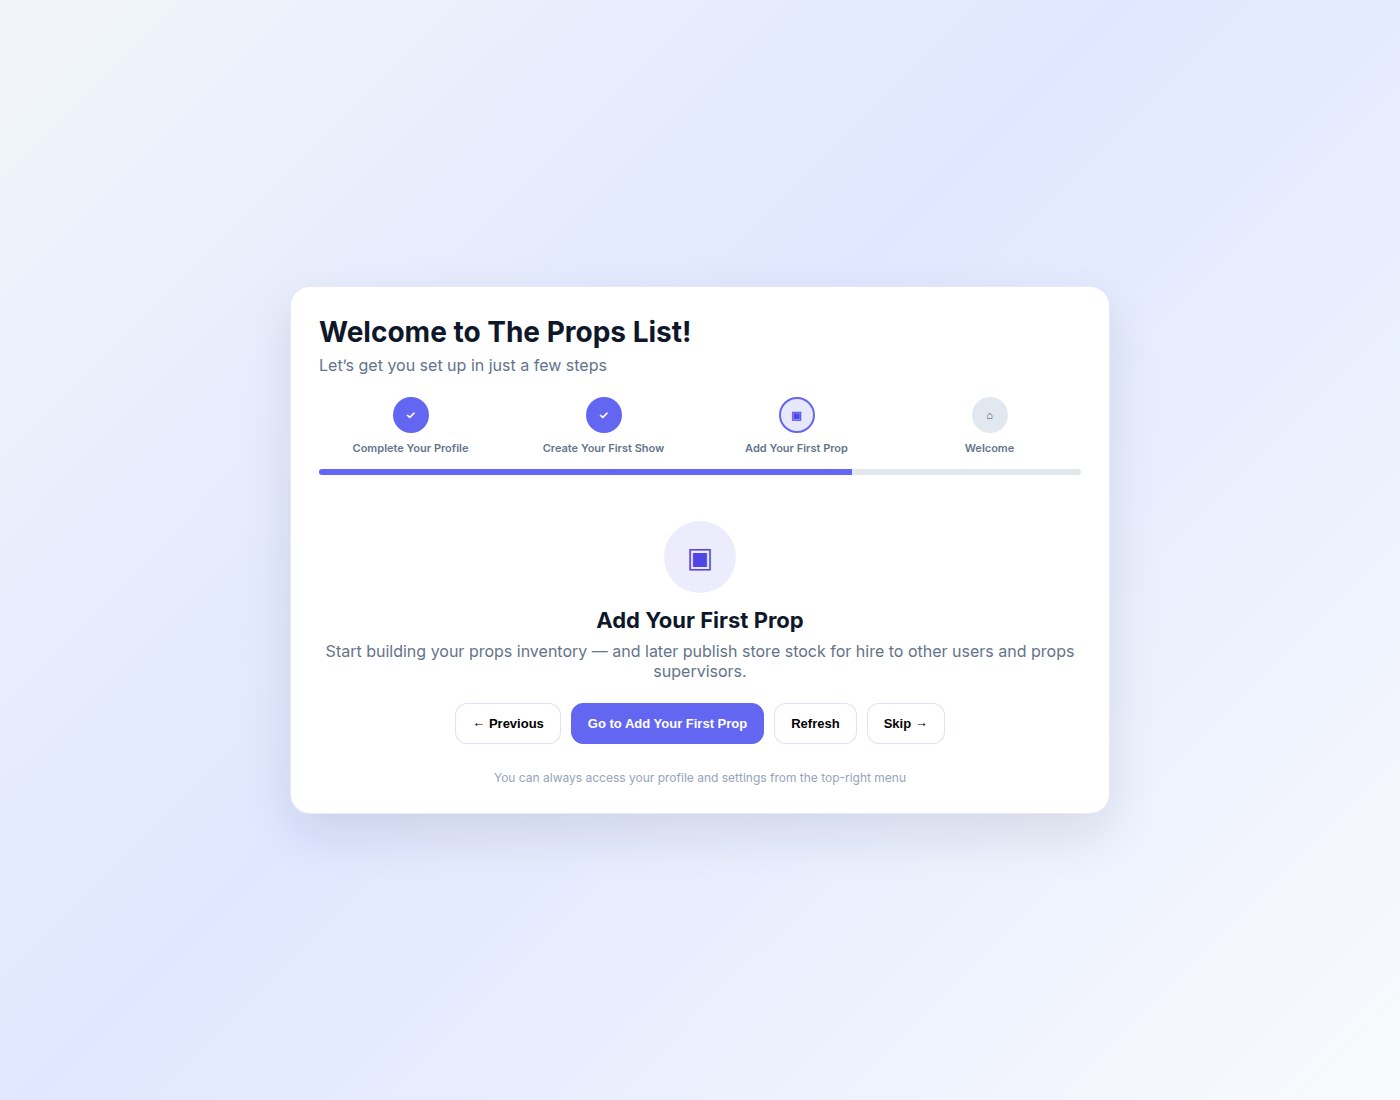
After a plan is selected, new accounts see a short wizard that auto-advances as you complete each step:
Create a Show — opens Add Show (/shows/new). A show is the workspace for props, tasks, packing, and team.
Add Users — opens the show team page so you can invite collaborators.
Add Props — opens Add Prop once a show exists.
You’re Ready! — returns to the dashboard.
Guided onboarding: create a show, invite crew, add your first prop
Create your first show in detail
Open Show Management in the sidebar, or follow the wizard to Add Show
Optional: Import from Ticketmaster — click to search for your show by name. Select an event to preview the details (including the show image), then confirm to auto-fill name, dates, venue, and production company. You can still edit any imported fields before saving.
Required and core fields:
Show Name (required)
Description, Start Date, End Date
Production contacts: Stage Manager (+ email), Props Supervisor (+ email), Production Company
Milestones: Start of Rehearsal, Start of Tech Week, First Performance, Press Night
Show status: Planning, In Production, In Rehearsals, In Tech, Running, On Hold, Cancelled, In Storage
Acts and scenes (defaults to one act with one scene — edit later)
Optional team invite rows and logo upload
Save the show
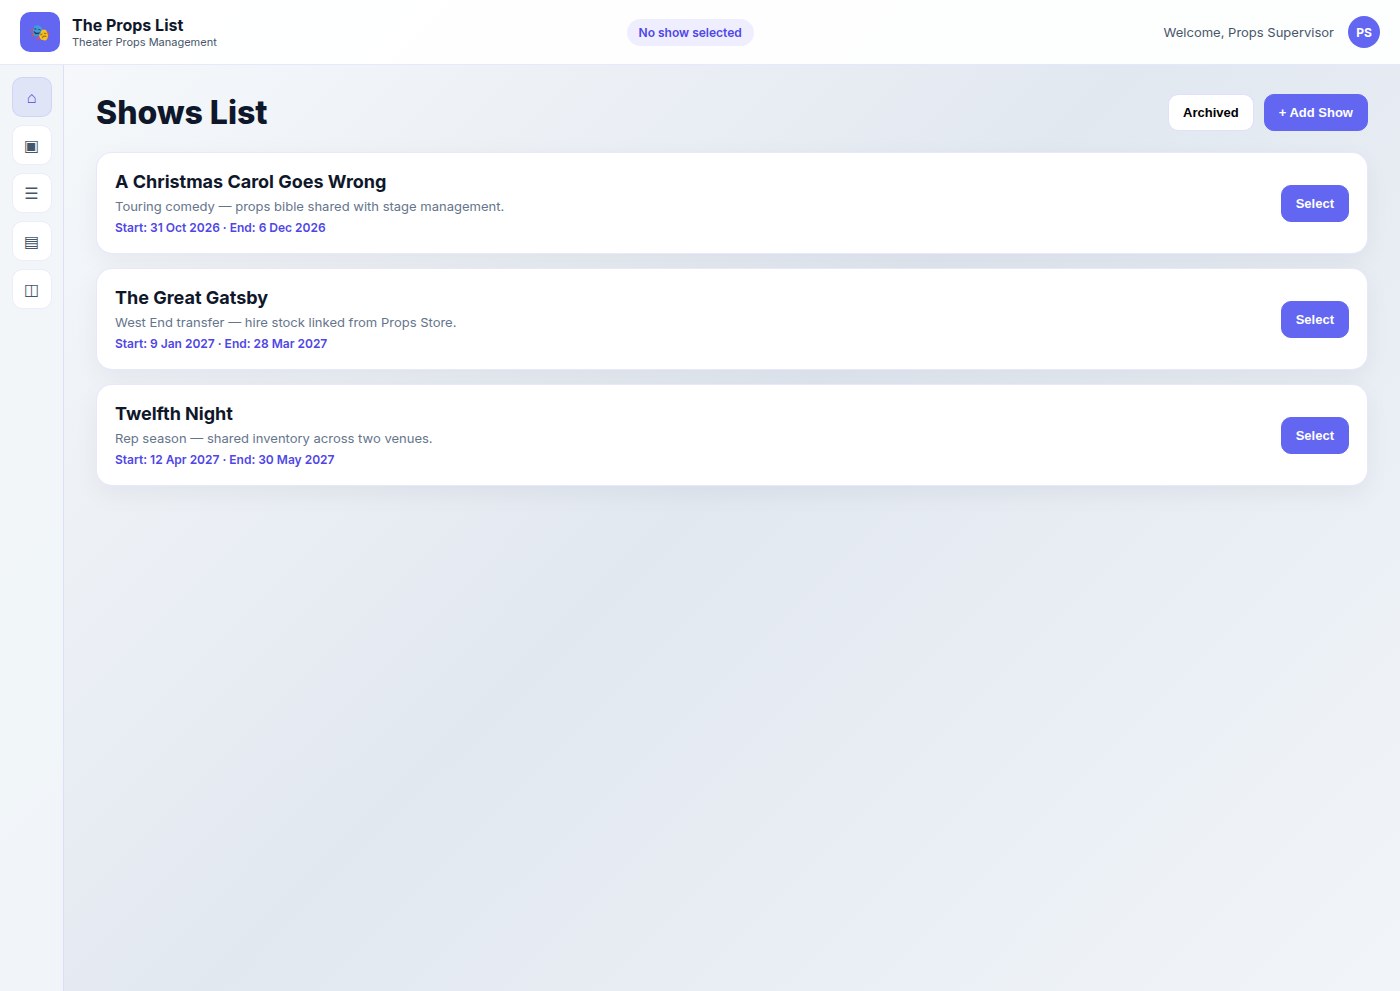
On the shows list, choose Select so it becomes the current show (button becomes Selected)
Import show details from Ticketmaster
Save time by importing show details directly from Ticketmaster. This feature auto-fills key fields so you don't have to type them manually.
On the Add Show page, click Import from Ticketmaster
Type your show name in the search box — results appear as you type
Click an event to see a preview with the show image, dates, venue address, and production company
Review the details in the confirmation modal. The "What will be imported" checklist shows exactly what fields will be populated.
Click Use This Show to import, or Cancel to search for a different event
Edit any imported fields as needed, then save the show
What gets imported: Show name, description, start and end dates, show image (used as logo), venue name and address, and production company (promoter).
Automatic sync: Shows imported from Ticketmaster are automatically checked daily for updates. If Ticketmaster changes the show dates, venue, or description, your show data is updated automatically.
Tip: Ticketmaster import works on both web and mobile. Not every show is listed on Ticketmaster — you can always enter details manually if your production isn't found.
Show Management — create productions, then Select the one you are working in
Add your first prop
Confirm a show is selected in the header
Open Props Inventory → Add Prop
Enter at least Name, Category, Status, description, and act/scene when known
Add photos and transit handling flags if the item needs special packing care
Save — the prop now appears in inventory for that show
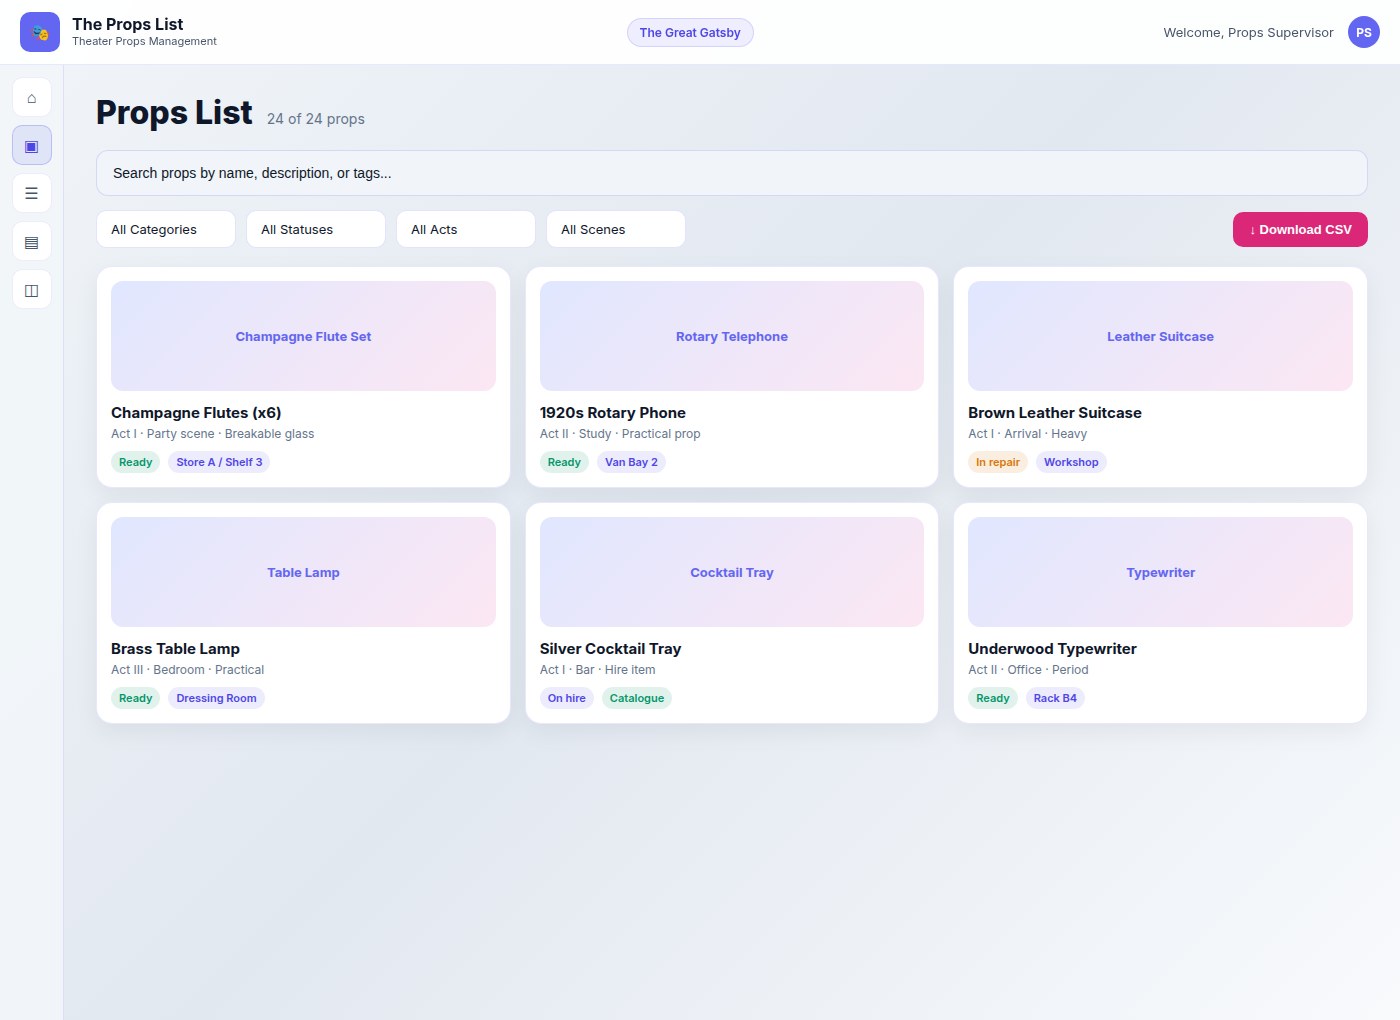
Props Inventory with search and filters by category, status, act, and scene
Home dashboard
After setup, Home shows the selected production, days until first performance, and a show-ready bar. Use Widgets (gear control) to show, hide, and reorder cards. Defaults depend on your job role. Widgets include:
My Tasks, Taskboard Quick Links, Taskboard Activity Summary, Upcoming Deadlines
Props With Tasks, Props Needing Work, Cut Props Packing
Tip: Always select a show first. Props, packing lists, shopping, boards, hire sheet, and CSV import are scoped to the current show. If Add Prop says “Please select a show first…”, pick one from Show Management.
Watch out
Plan limits apply to shows, props, boards, packing boxes, and collaborators. If create actions are blocked, check subscription limits or archive finished shows. Draft show forms may restore from browser storage if you leave mid-create.
Props Management
Why this matters
Props supervisors need a live inventory that answers “what is it, where is it, and is it show-ready?” without chasing makers or reopening last week’s spreadsheet. Status, photos, act/scene, source, and transit flags turn the list into a working production tool.
Open inventory
Use Props Inventory in the sidebar (/props). From here you can search, filter, bulk-update status, download CSV, open a prop, edit it, or add a new one.
Add or edit a prop — field by field
Basics
Photos — visual reference for stage and store
Name (required) — clear, searchable title
Colour, Description
Act and Scene — from the current show’s structure
Pricing & quantity
Price
Quantity (Ordered) (required)
Required Quantity, Quantity In Use — spare / shortage signals when numbers differ
Source
Choose how the prop enters the show. Changing source can auto-set status until you override status manually:
RequiredPlaceholder for props still to source — status often → to be bought or to be made
BoughtOnline retailer or physical store, retailer name, purchase URL, estimated delivery — status often → awaiting delivery
MadeMaker (select or add), estimated delivery — status often → to be made
HiredHire company details and return method — status often → awaiting delivery
BorrowedBorrowed from, delivery/return dates — status often → awaiting delivery
OwnedAlready in your inventory — status often → show ready
3D PrintedTrack printer, filament (type, brand, colour), print settings, estimated time, post-processing (sanding, painting, fitting), and store STL/STEP/3MF/OBJ/GCODE files for reprinting
Printed (paper)For documents, letters, posters — store print file URL, paper size, copies, colour/B&W, laminated flag, and print notes
Category
Furniture, Decoration, Costume, Weapon, Food/Drink, Book/Paper, Electronics, Musical Instrument, Hand Prop, Set Dressing, Special Effects, Lighting, Other.
Transit handling & physical data
Checkboxes: Fragile / Handle with care, This way up, Keep dry, Do not tilt, Battery hazard
Dimensions (L/W/H + unit) and weight for packing and labels
Instructions and digital assets
Add/edit also has Usage Instructions & Assets, Maintenance Instructions & Assets, and Other Digital Assets for setup notes, care files, and rebuild references.
Prop status on create/edit
When you add or edit a prop, the status dropdown tracks production workflow:
To be madeStill needs building or fabrication
To be boughtNeeds purchasing
Awaiting deliveryOrdered, hired, or borrowed — not on site yet
Show ReadyReady and included
ShareShared across productions or departments
Replacement neededCurrent item must be replaced
Needs repair/modMaintenance or modification required
CutRemoved from the show (you may be prompted for a storage location)
On holdPaused pending a decision
Inventory and bulk tools can also expose a richer lifecycle vocabulary (for example In Transit, Missing, Loaned Out, Available in Storage). Use the status that matches the conversation your crew already has; keep filters consistent within a show.
Find, filter, and export
Search: “Search props by name, description, or tags…”
Filter by category, status, act, scene; optionally spare filter (all / has spares / low inventory)
Select multiple props to Update status in bulk
Download CSV from Props Inventory for spreadsheet handoffs
CSV columns include ID, Name, Description, Category, Status, Quantity, Act, Scene, Location, Manufacturer, Model, Serial Number, Colour, Style, Condition, Purchase URL, and media URLs.
Tip: Write names the way stage management would call them on the headset. Pair photos with act/scene so understudies and cover staff can identify the item without the original maker present.
Watch out
Show must be selected. Plan prop limits warn near capacity and can block creates. Mobile photo uploads should stay under about 5MB. Import defaults and create-form statuses can differ — map carefully when bringing spreadsheets in.
Show Management
Why this matters
A production needs one place for company contacts, dates, venues, and the map of acts and scenes. Without that frame, props cannot be filtered by use, packing cannot target a venue, and new crew join without context.
Shows list
Open Show Management (/shows)
Create with Add Show, or open an existing show
Press Select on the show you are working in — inventory and boards follow that selection
Use Archived to review soft-archived productions without deleting history (plan limits apply to how many you keep archived)
Show detail
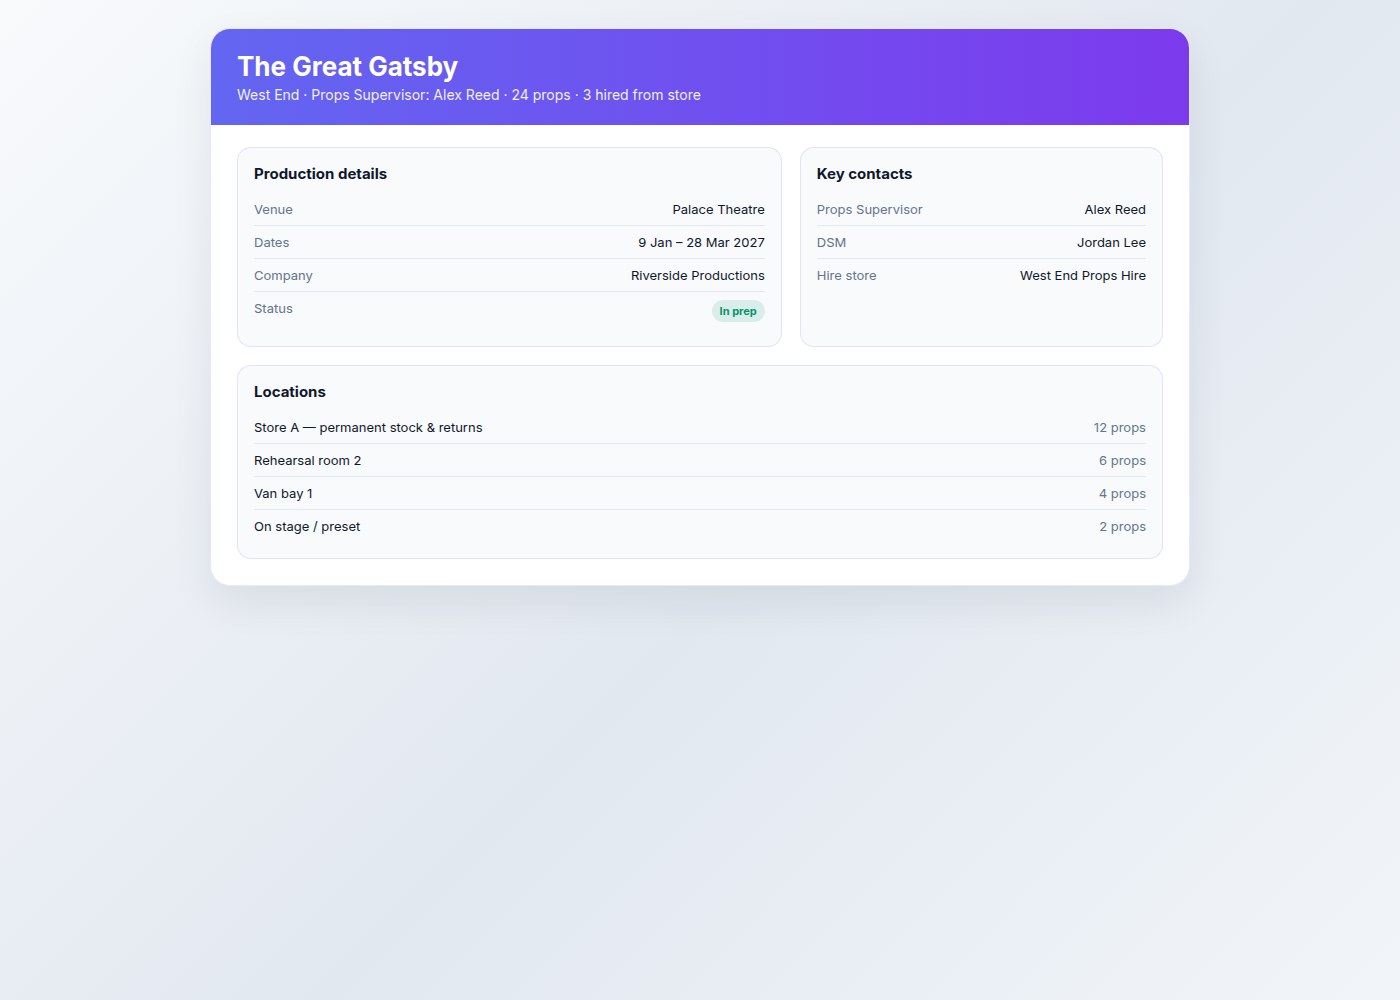
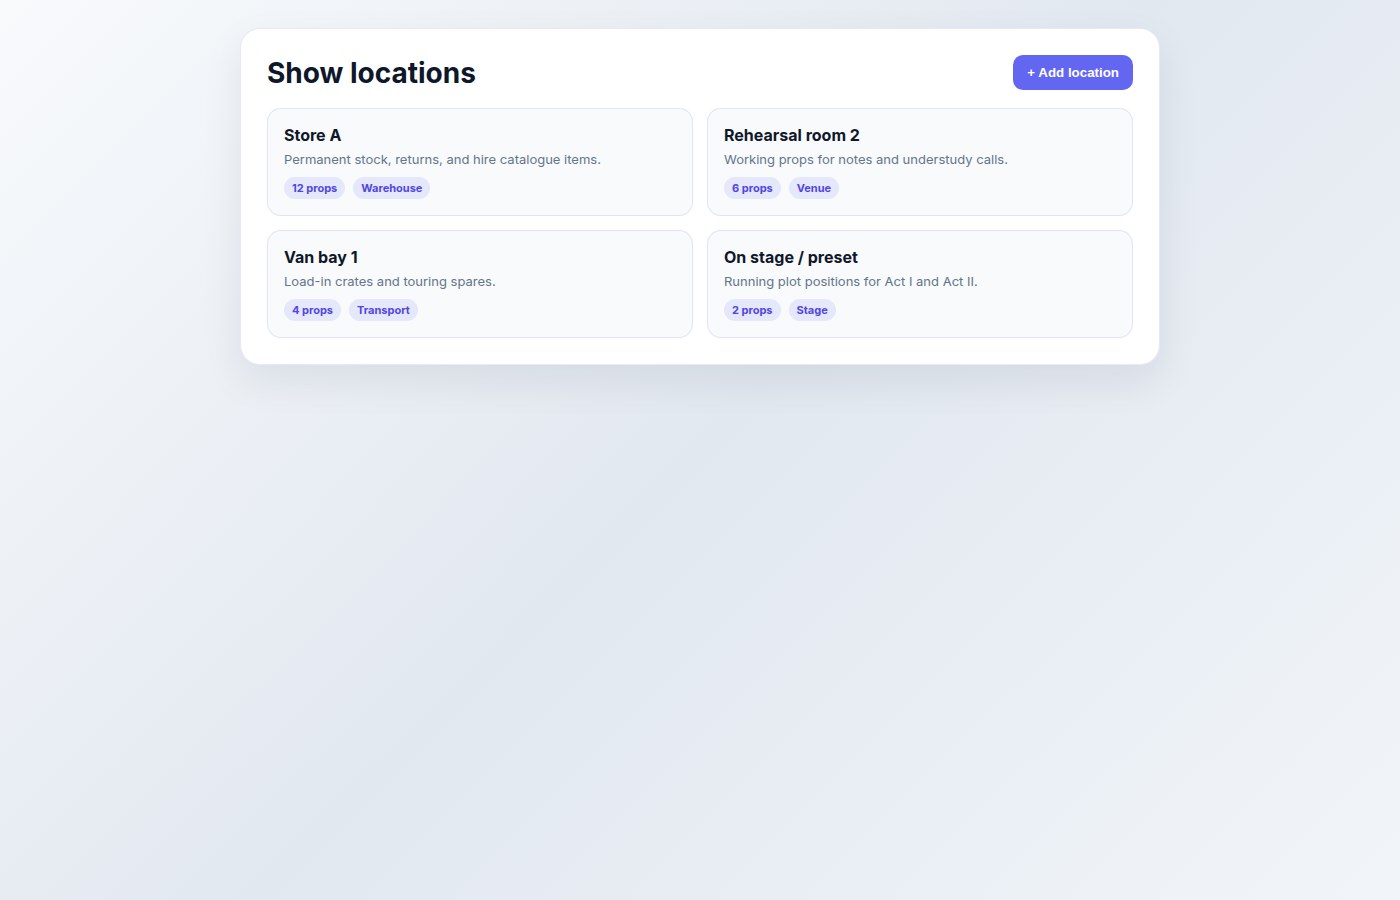
On the show page you will see status, Edit Show, production contacts, and sections for locations, acts & scenes, and team.
Show detail — contacts, dates, edit actions, and production structure
Acts, scenes & locations
Create or edit acts and nested scenes so props can be filtered by where they appear
Add venues, rehearsal spaces, and storage locations for packing and handovers
When adding props, assign Act/Scene from this show’s lists
Venues and locations for the production
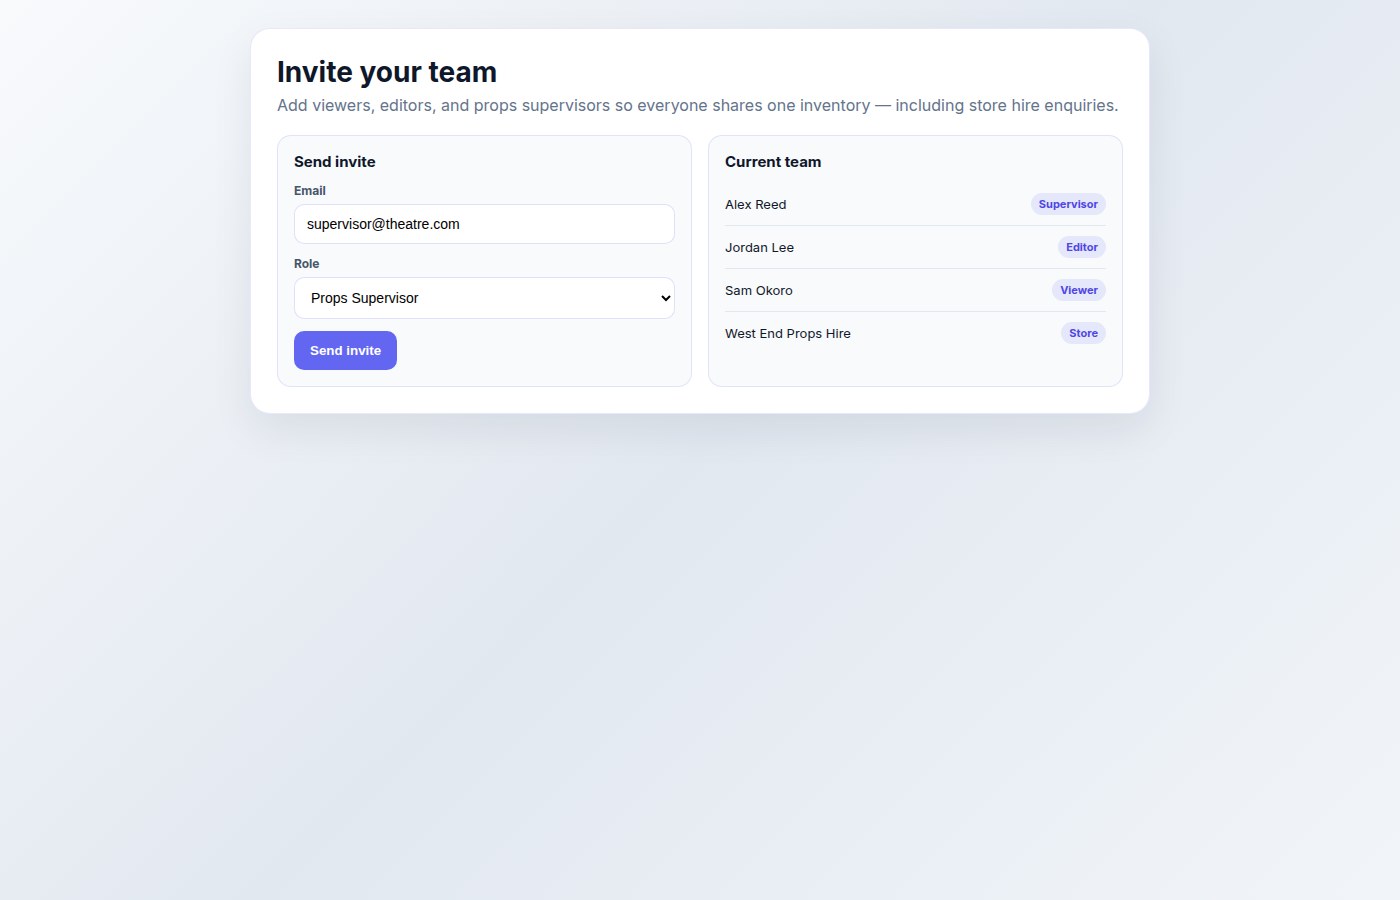
Acts, scenes, and team invite controls on the show
Invite from the show
Owners, props supervisors, and god users can open Invite Team on the show (modal title Invite teammate), or Manage Team for the team page. Enter name, email, and job role, then Send invite. Full role detail lives in Team Collaboration.
Tip: Set milestones (rehearsal, tech, first performance, press night) early — they frame buying and making deadlines for the rest of the tools.
Watch out
Creating a show is not enough — you must Select it. Mobile covers create/list/detail well; deep edit, archive, and team admin are strongest on web.
Packing Lists
Why this matters
Load-in, touring, and store moves fail when nobody knows which crate holds which prop. Packing lists turn inventory into labelled containers so truck packs, rehearsal moves, and venue handovers stay accountable.
Create a packing list
Select a show
Open Packing Lists
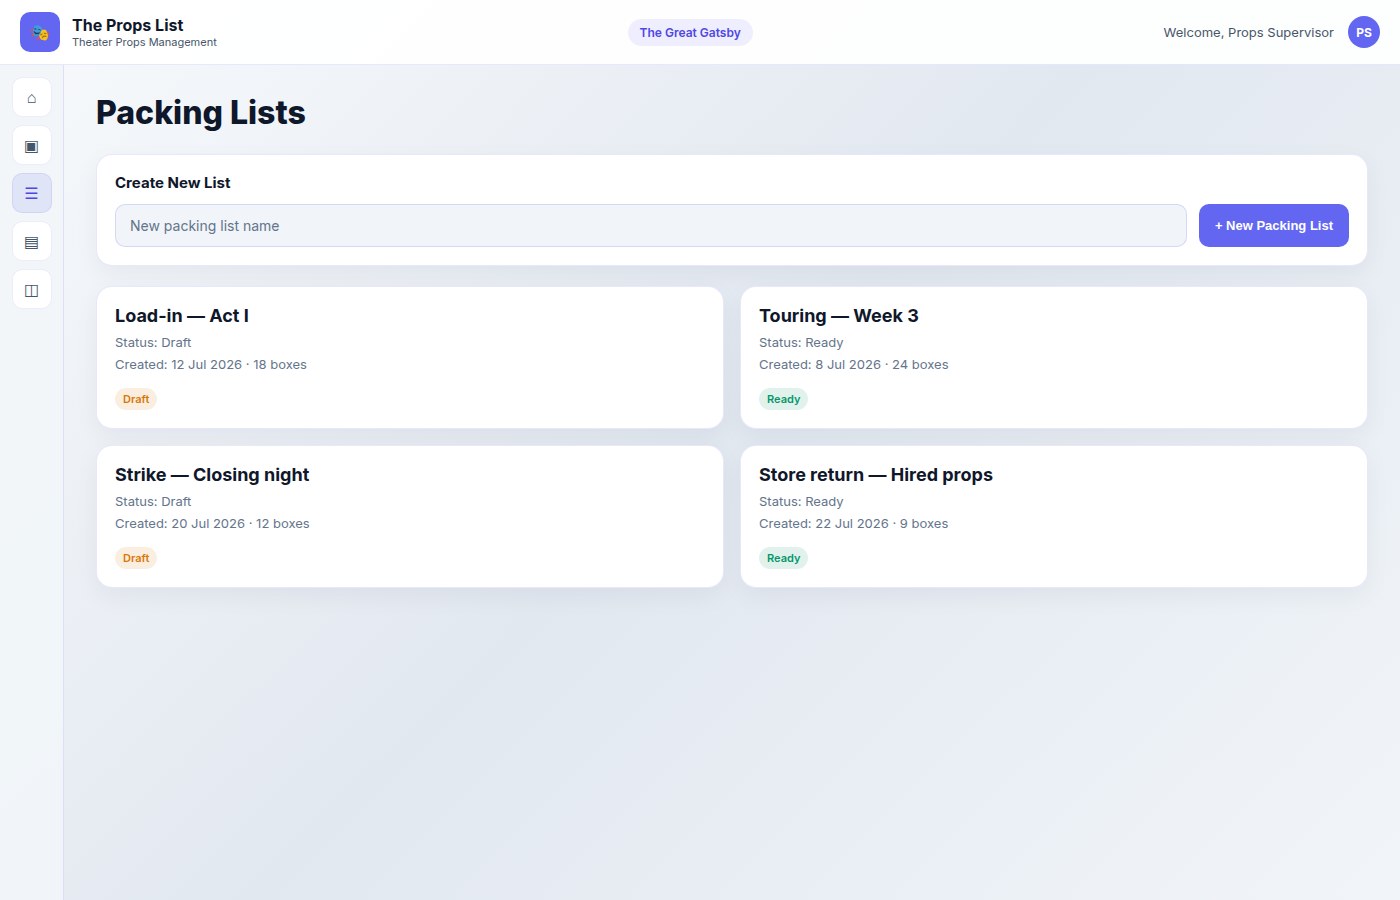
Choose Create New Packing List, name it (for example “Act 1 truck” or “To rehearsal space”), then Create List
Packing Lists overview — create lists, then open one to add containers and props
Inside a packing list — tabs
Props
See props for this show and assign unpacked items into containers.
Containers
Add boxes/crates from templates: Cardboard Box, Pallet, Flight Case, Crate, Tote. Nest containers when packs sit inside larger units. Use Save Container to persist a box, or Details & Label for the container page and QR.
Delivery Details
Shipping fields and Expected Delivery Date. Save delivery details; tour mode can pull a tour label from the show. Mark transit / arrived as status changes.
Labels
Generate Labels and Print Labels with QR codes for containers.
QR codes and public container links
Open a container on the packing list
Use the generated QR / public link shaped like https://thepropslist.uk/c/{containerId}
Share with crew who need read-only access during load-in without full app accounts
Tip: Set transit handling flags on props (fragile, this way up, keep dry) before you print labels so warnings travel with the pack.
Watch out
Packing box counts can hit plan limits. Public container pages need network access. Mobile is strong for packing on the floor; public container viewer is a web/public URL.
Shopping Lists
Why this matters
Buying work scatters across notes, DMs, and browser tabs. A shared shopping list keeps options, approvals, and spend visible so buyers and supervisors agree before money leaves the budget.
Open shopping and add a request
Select a show
Open Shopping List (/shopping)
Work in tabs: Props, Materials, or Hired Props
Choose Add Request (web). Fields:
Title (required)
Labels — comma-separated (for example “Screwfix, Flower Market”)
Quantity (1–9999 whole numbers)
Budget (£) — greater than £0
Optional image
Options and approval
On a request, choose Add Option — notes, price, images, Product URL, uploaded-by
Set each option to Pending, Maybe, Buy, or Rejected
When an option is marked Buy, the request can move towards picked / bought
Use Convert to Prop after purchase when the bought item should enter inventory
Search by title, filter by label, and watch the budget badge (“Budget: £X”) so spend stays visible on the request. Show-level pots — remaining for transport, hires, buying, materials, and staffing — live under Budget, which is built for props supervision. After items are hired in, use the Hire Sheet for return dates and costs.
Tip: Capture product URLs on options so a second buyer can reorder the same SKU without re-researching.
Watch out
Web CTA is Add Request. On Android, add from Home or a show with Add Prop, Add Material, or Add Hired (shopping is not a bottom tab). Approval happens on options (Pending/Maybe/Buy/Rejected), not a single Approve button.
Budget
Why this matters
Budget tracking is for props supervision. The rest of the team exists to feed the supervisor the information they need: a current answer to how much is left, where it went, and what is already promised. It is not a company accounts package.
Who can see it
Show owners and props supervisors can open Budget (/budget) and allocate pots
Supervisors may grant view access to an assistant (or anyone on the show) so that person can monitor remaining
By default nobody else sees remaining. Per-pot “share remaining with the team” is a supervisor toggle
Buyers and makers can log a cost without opening the books
Set up pots
Select a show
Open Budget in the web sidebar
Start with the five default pots: Transport, Hires, Buying, Materials, Staffing
Give each pot its slice of the departmental figure — allocations may be £0
Add custom pots if the show needs them; unused system pots can be archived
A departmental cap is optional. If you set one, leftover shows as unallocated.
Log spend and move money
Log a cost against a pot from Budget, Shopping, or the dashboard — description, amount, vendor if you have it
Shopping requests still have their own item budget; that is a request ceiling, not the show pot
Move money between pots when a hire comes in high or a buying line comes in cheap — that is normal, not a failure
Overspend warns; it does not hard-block. Productions still have to spend when a van is needed tomorrow
On Android
The phone gets a brief supervisor overview on Home (remaining per pot), not the full budget workspace. Use the web app to allocate pots, share remaining, and move money.
Tip: A morning digest can email yesterday’s logged spend and remaining per pot to supervisors, show owners, and granted viewers. Opt out on Budget or Profile if you don’t want it.
Watch out
This is not VAT or payroll. Amounts are stored as typed. Item-level shopping budgets and show pots are different numbers — don’t treat one as a substitute for the other.
Deliveries
Why this matters
When props are on order, someone always asks "Who ordered it?" and "When will it arrive?" Without central tracking, you're chasing team members and scrolling through emails. Deliveries puts all expected packages in one place so the whole crew knows what's coming and when.
Open Deliveries
Select a show (deliveries are show-scoped)
Open Deliveries (/deliveries) from the sidebar
See all expected deliveries at a glance — overdue items highlighted in red
Add a delivery
Click Add Delivery
Enter a Description (what's being delivered)
Set Status (Pending, Dispatched, In Transit, Out for Delivery, Delivered)
Set Expected Delivery Date
Select a Courier from the dropdown (Royal Mail, DHL, FedEx, UPS, DPD, Evri, and 15+ more)
Enter the Tracking Number from your dispatch email
Optionally add supplier name, order reference, and costs
Automatic tracking links
When you select a courier and enter a tracking number, the system automatically generates a tracking link to the courier's website. You don't need to paste any URLs — just click "Track Package" and see live tracking directly on the courier's site.
Supported couriers include:
UK: Royal Mail, Parcelforce, DPD, Evri (Hermes), Yodel, UK Mail, CollectPlus, InPost, APC Overnight, Arrow XL
For couriers not in the list, the system falls back to universal tracking services (17track) that can track most international shipments.
Who ordered what
Each delivery shows who added it, so you can quickly find the person who placed the order if there are questions. The dashboard widget also displays this information at a glance.
Dashboard widget
The Delivery List widget on your Home dashboard shows props on order with expected delivery dates. Click any item to see details or use the tracking link. Overdue deliveries are highlighted so nothing slips through.
Update delivery status
Each delivery has quick action buttons for common updates:
Tick icon — Mark as Delivered when the package arrives
Clock icon — Mark as Delayed with a reason (weather, customs, courier delay, etc.) and optionally update the expected date
Alert icon — Mark as Lost if a package goes missing
Pencil icon — Edit to update any details including tracking info, dates, or notes
Delivery history timeline
Every delivery tracks a timeline of events. Click "X events" on any delivery to expand and see the full history — when it was created, when status changed, when delays were reported, and any notes added along the way. This audit trail helps you understand what happened if a delivery goes wrong.
Notes and delay reasons
Notes appear as a preview on each delivery card so you can see at a glance if there's important information. When you mark a delivery as delayed, the reason is automatically added to the notes with a timestamp, building a history of any issues.
Tip: When a prop is set to "On Order" status, it automatically appears in the delivery list. Add the tracking number and courier to the prop itself, or create a standalone delivery record for non-prop items like materials and consumables.
Watch out
Tracking links go directly to the courier's website — The Props List doesn't store tracking data or provide live updates. Click the link to see the latest status from the courier themselves.
Task Boards
Boards → Lists → Cards
Why this matters
Making, repairs, buying, and show-week prep stall when ownership is unclear. Task Boards give the crew a shared board for one workflow so status moves in public — not in private chats — and each card points at a real next action.
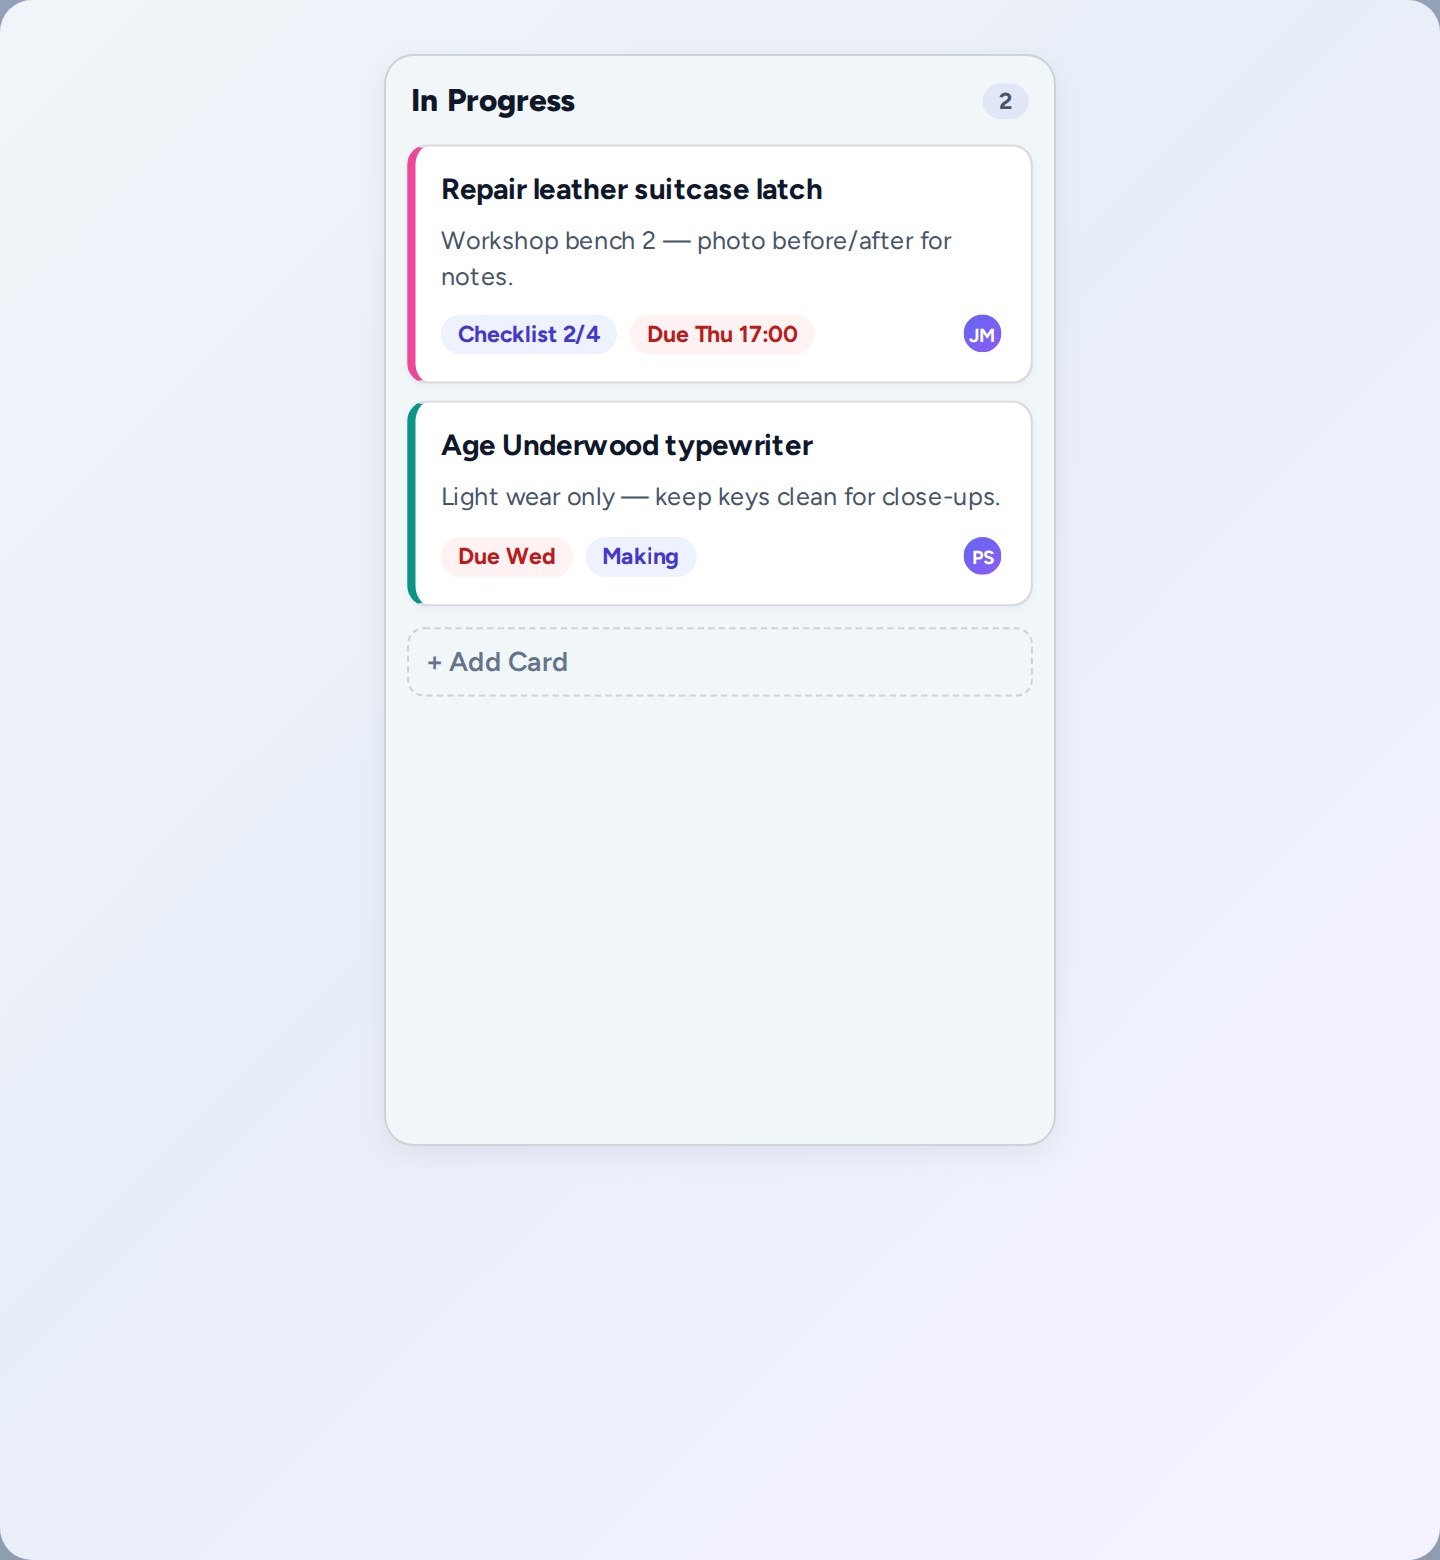
Task Boards keep production work visible for the current show. Use a board for one workflow, lists for stages of work, and cards for each task you need someone to finish. Type at in a card title to link props, boxes, users, or due dates.
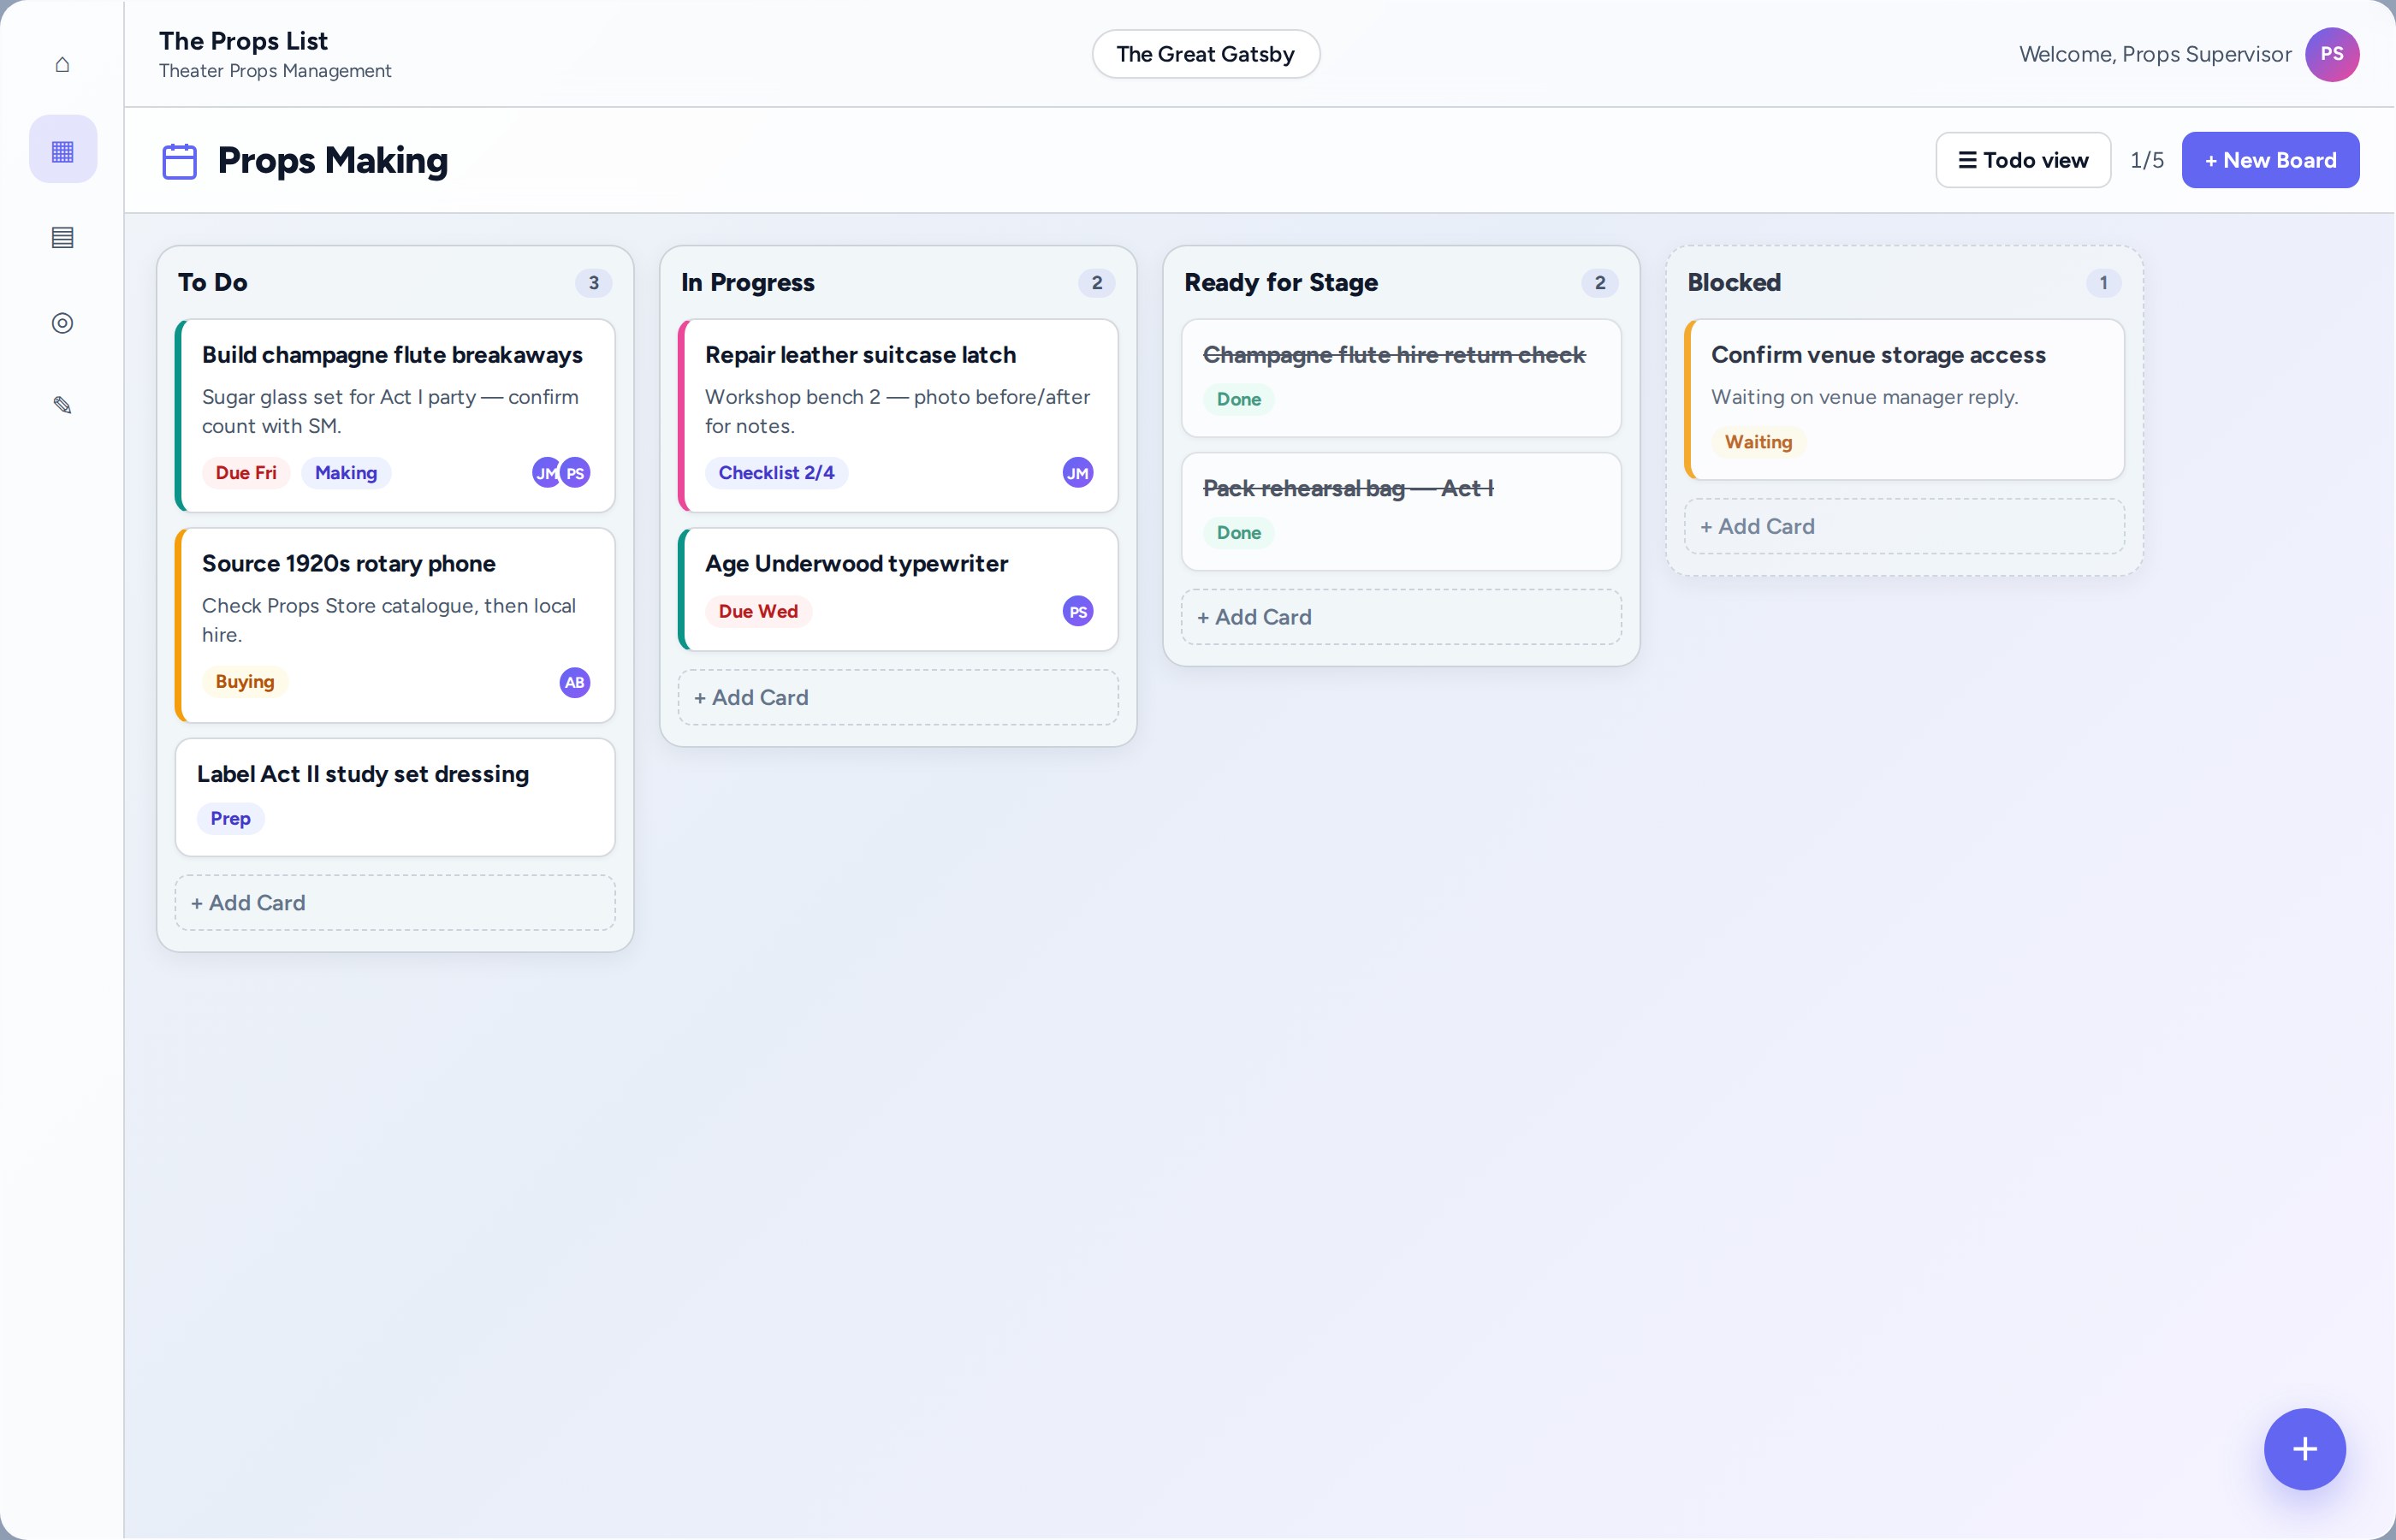
Show-scoped board with workflow lists and task cards — open Task Boards from the sidebar
Hierarchy: one board, lists for stages, cards for individual tasks
Why boards — and how to create them
A board is a workspace for one workflow on your show — for example Props Making, Show Week, or Buying. Keep boards focused so the crew can see the right work without scrolling through everything.
Select a show first
Open Task Boards
On first visit, the How Task Boards work walkthrough appears (reopen anytime from the beta strip or help icon)
Choose Create Board / New Board, enter a board name, save
Switch Kanban, List, or Calendar from the board header; plan limits show beside New Board
Board header — view toggle, plan limit, New Board
Tip: Prefer several clear boards (“Props Making”, “Show Week”) over one overloaded “Everything” board. Use Calendar during tech week to see work by the day it needs to be finished.
Why lists — stages of work
Lists are the columns on a board. They represent stages of work such as To Do, In Progress, Ready for Stage, or Blocked. Dragging a card into a new list updates its status for everyone on the show.
On an empty board choose Add list (or the + control)
Rename the list to a stage your company understands
Add more lists; drag lists sideways to reorder
Suggested starter: To Do → In Progress → Done / Ready for Stage; add Blocked when waiting is common
List close-up — cards at one stage, + Add Card at the bottom
Why cards — tasks with owners
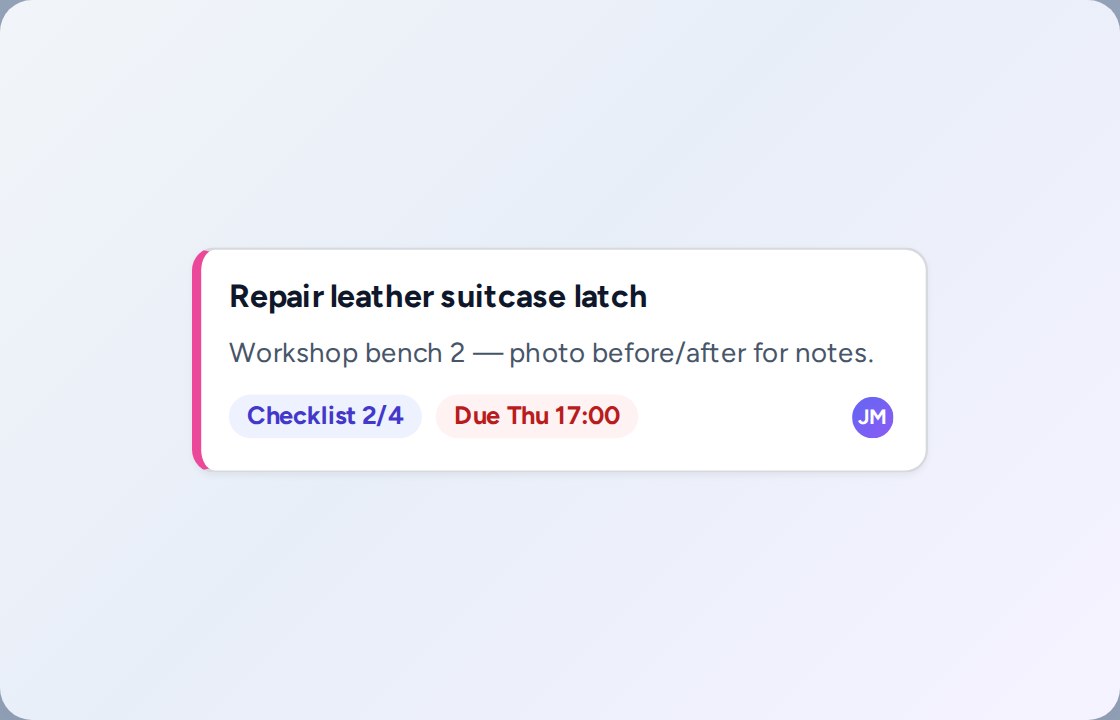
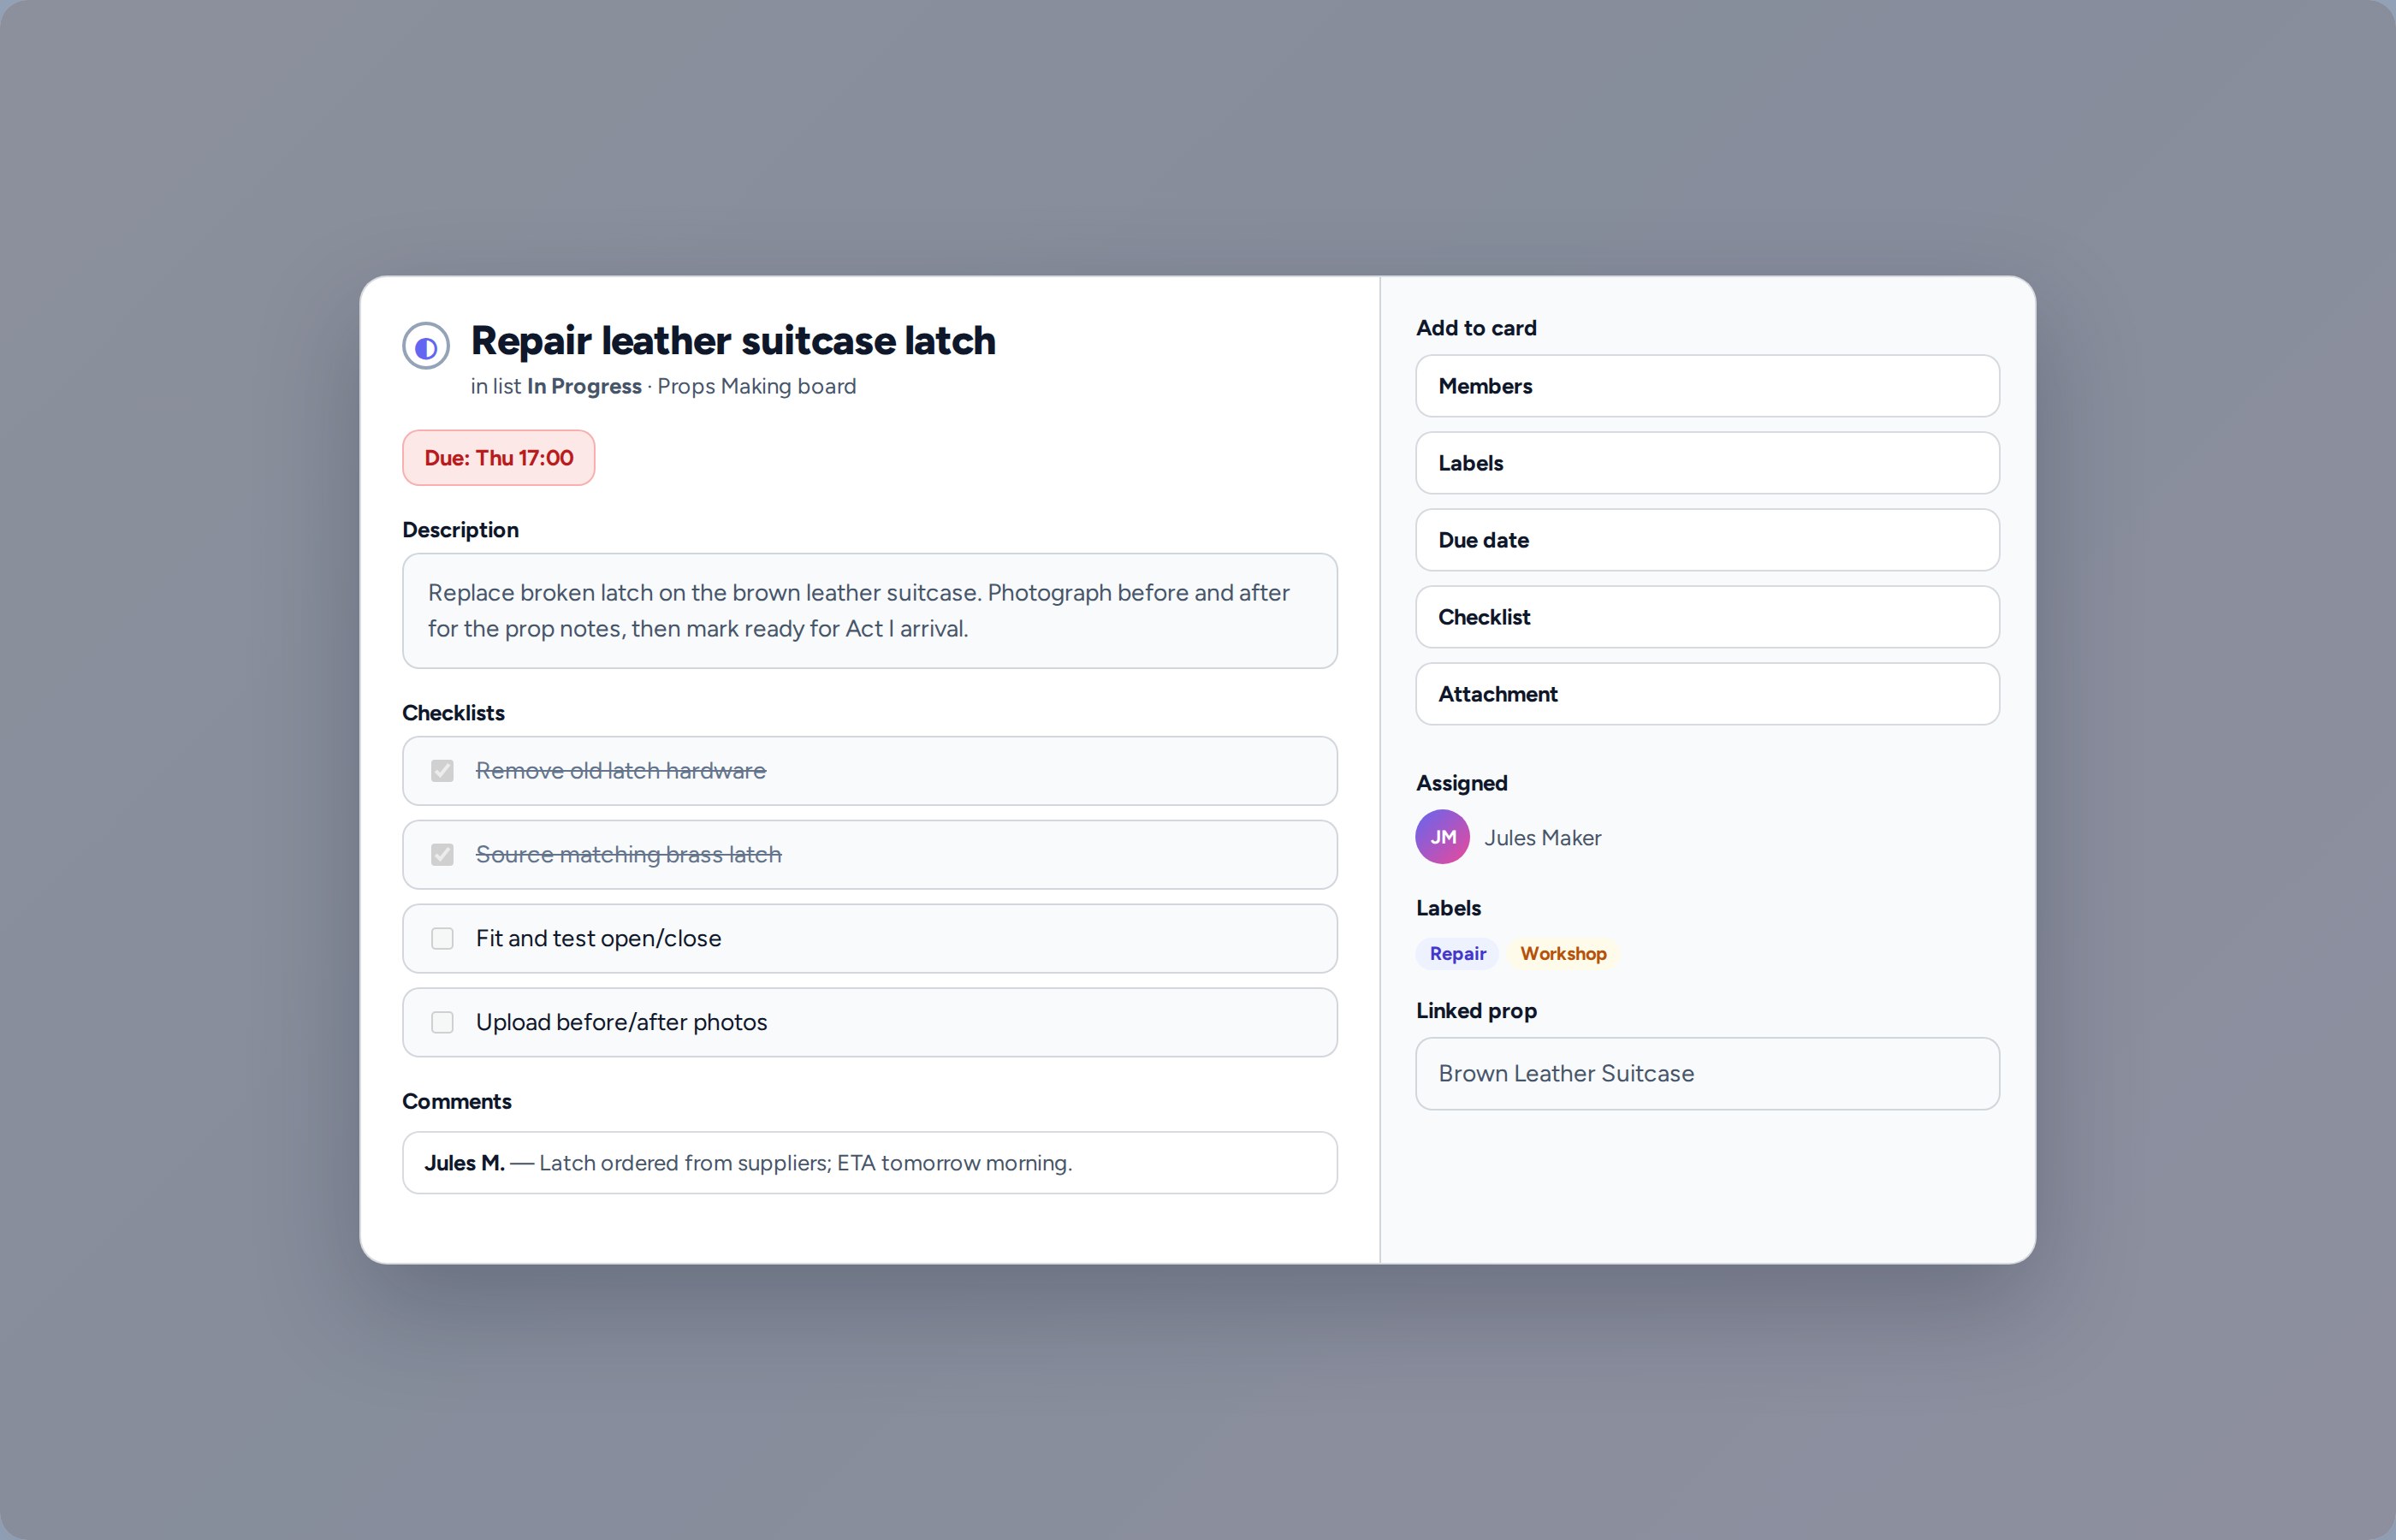
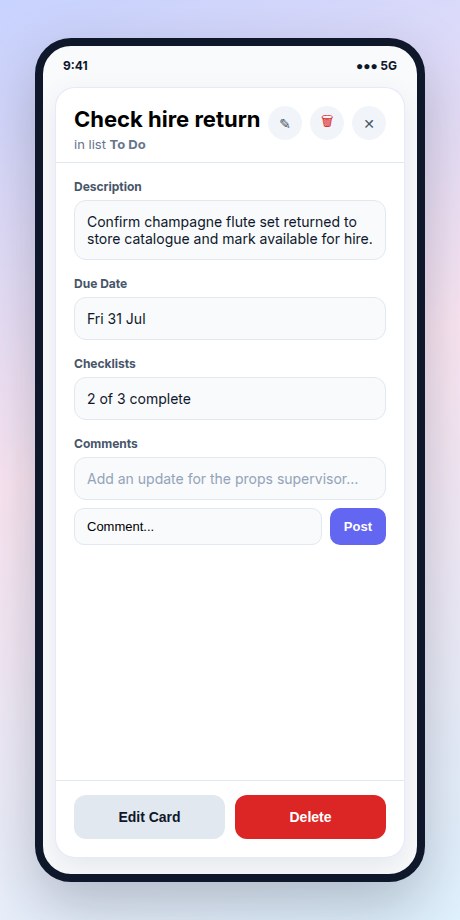
A card is one clear task. Add a short title, optional description, due date, assignees, checklist, labels, comments, and a linked prop when the work belongs to a specific item.
In a list choose + Add Card and type an action title
Open the card to edit description, due date, checklist, members, labels, comments
Assign owners with Members / Assign — not only by typing a name
Drag the card between lists as work progresses
Optional: start from a prop with Create Task from Prop — pick board, list, title, then Create Task
Tip: Write titles as actions (“Repair leather suitcase latch”). Type @ in the title to open the mention menu.
Calendar — plan by due date
Calendar view shows tasks on the day they need to be done. Use Week during tech week to plan Sunday unload, Monday rehearsal access, and so on. Use Month when prep stretches over several weeks. Drag a task onto a day to set or change its due date. Tasks without a date sit in No due date until you schedule them.
Open a board and choose Calendar in the header
Switch Week or Month to match the length of your tech period
Add a task on a day, or drag an unscheduled task onto the day it must be finished
Open a task to edit the due time, assignees, checklist, and linked prop
Tip: Give cards a due date even if the time is approximate. The calendar is for “done by this day”, not a minute-by-minute call sheet.
The @ context menu — deep dive
Why this matters
Tasks only help if they connect to the right prop, packing box, or person. The @ menu links a card into your live show data so nobody pastes names from memory.
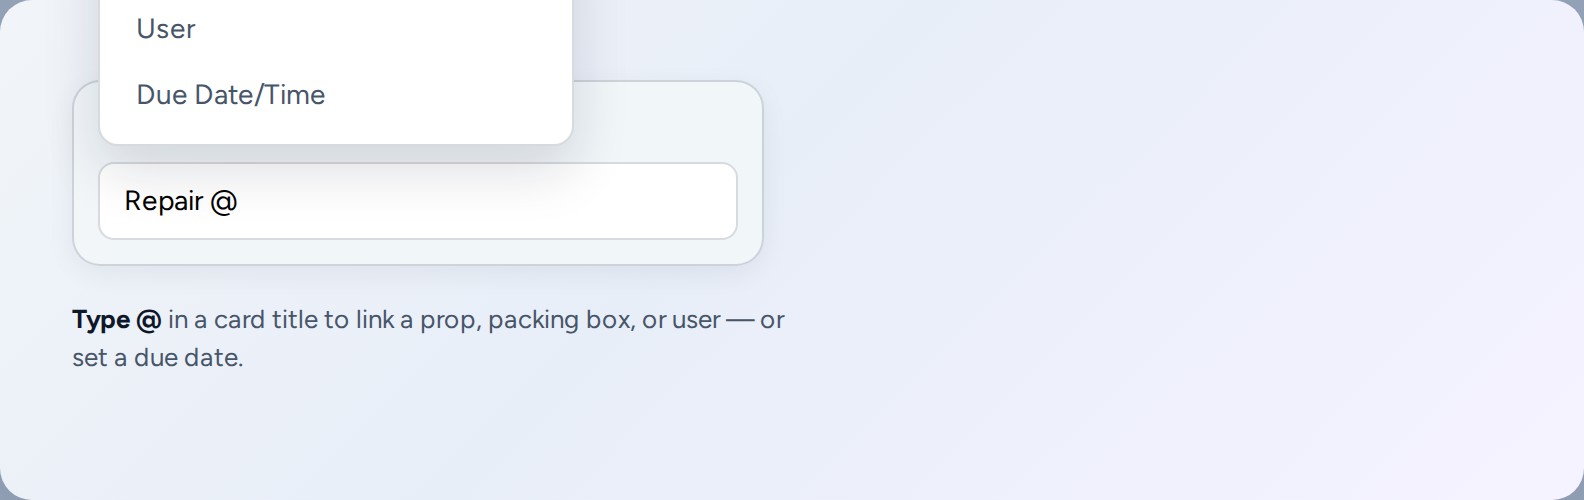
In a card title on Task Boards, type the at symbol to open the context menu. Choose Prop, Box or Container, or User, then search and select. You can also set a due date from the menu. Mentioning a user is not the same as assigning the card — use Assign when someone owns the work.
Open + Add Card, Todo quick-add, or edit a card title
Type @ — the Mention Type menu appears
Choose:
Prop — search inventory; links under Linked to and can set the card’s prop link
Box/Container — link a packing container
User — insert a mention in the title text
Due Date/Time — opens the date/time picker (removes the @ from the title)
Search, select, then save / press Enter
Type @ in a card title — Prop, Box/Container, User, or Due Date/Time
Mention vs assign@ User inserts text. Ownership needs Assign / Members (or Assign to User where the menu offers it).
Where it worksWeb: titles and quick-add on Kanban/Todo. Mobile: titles and descriptions. Comments do not open the @ menu.
After saveLinked props/containers appear under Linked to and open the matching page.
Everyday workflow
Create the board, add lists for your stages, create cards for each task, assign owners, then drag cards as work progresses. Switch to Todo view when you want a simple checklist instead of columns.
Kanban viewColumns for stages — best for shared crew boards
Todo viewFlatter list for personal focus or quick check-offs
Create from a propStart a card from props workflows when making, repair, or hire work belongs to one item
Same card details on mobile — update work from rehearsal or the workshop
Task history on props
Why this matters
Repair and maintenance tasks tell the story of a prop's life. When a repair task is completed, the full record — including comments, checklists, and attachments — is preserved on the prop's maintenance history, even if someone later deletes the task card.
When you complete a repair or maintenance task that is linked to a prop, the app saves a snapshot of that task to the prop's maintenance history. This includes the task title, description, who completed it, any comments the team added, checklists showing what was done, and attached files. If the task card is later deleted from the board, the maintenance history keeps that snapshot and shows a note that the original task was removed.
What gets preserved
Task title & descriptionThe work that was requested
AssigneesWho was responsible for the work
CommentsTeam discussion, updates, and decisions
ChecklistsStep-by-step work completed (with tick status)
AttachmentsPhotos, documents, or reference files
Completion infoWhen and by whom the task was finished
Viewing maintenance history
Open a prop's detail page
Scroll to Maintenance History
Each record shows the type (repair, maintenance, modification, inspection), date, and who performed the work
Expand a record to see preserved comments, checklists, and attachments
If the original task was deleted, an indicator shows when it was removed
Tip: Add comments to repair tasks as work progresses. These notes become part of the prop's permanent record, useful for future repairs or handover to a new crew.
Team Collaboration
Why this matters
Props departments are crews, not solo operators. Inviting people with clear job roles stops edit chaos, keeps viewers read-only when needed, and shows who owns making, buying, and stage management.
Where to invite
Show detail → Invite Team (opens Invite teammate) or Manage Team
Team page /shows/{id}/team → Invite teammate
Onboarding step Add Users
Invitees join via /join/{token}
Who can invite on a show: owner, props supervisor, or god.
Invite form fields
Name and Email
Job role — Prop Maker, Senior Prop Maker, Props Carpenter, Show Carpenter, Painter, Buyer, Props Supervisor, Art Director, Set Dresser, Stage Manager, Assistant Stage Manager, Designer, Assistant Designer, Crew
On the team page, a second Role field uses the same job-title list (Props Maker, Painter, Buyer, and so on) for the collaborator’s working title
Send invite — they create/sign in and open the secure link
What permissions control
Fine-grained actions cover inviting/removing people, assigning job roles, creating/editing props, approving shopping options, managing packing, boards, and budget visibility. Match job role to the work someone actually does so editors and viewers stay intentional.
Tip: Send a reminder email for pending invites. Collaborator limits depend on plan (smaller plans allow fewer seats per show).
Watch out
If the email is already registered, ask them to sign in and open the invite link — or add them as a collaborator — instead of treating them as a brand-new account.
Import & Export
Why this matters
Most shows start from an existing spreadsheet. Import gets that list into the live system fast; PDF and CSV export still cover rehearsals, handovers, and venues that need a printed or offline pack from your digital props bible.
Import props (CSV)
Select a show and sign in
Open Import Props in the sidebar (/props?import=1) or go to /props/import
Upload CSV File, or Download template first
Use Map Columns so spreadsheet headers match app fields
Max about 1000 rows per upload — split larger files
Name required; blank names become “Untitled”
Category defaults to Other; quantity defaults to 1; price defaults to 0
Source should be values such as bought, made, rented, borrowed, owned, created, hired (otherwise treated as bought)
Blank status can default to available_in_storage
imageUrl must be http(s) with an image extension
Tags split on commas or semicolons
Messy CSVs: use Copy AI prompt to clean the sheet, then re-upload
Export props PDF (digital props bible)
Open Export Props PDF (/props/pdf-export)
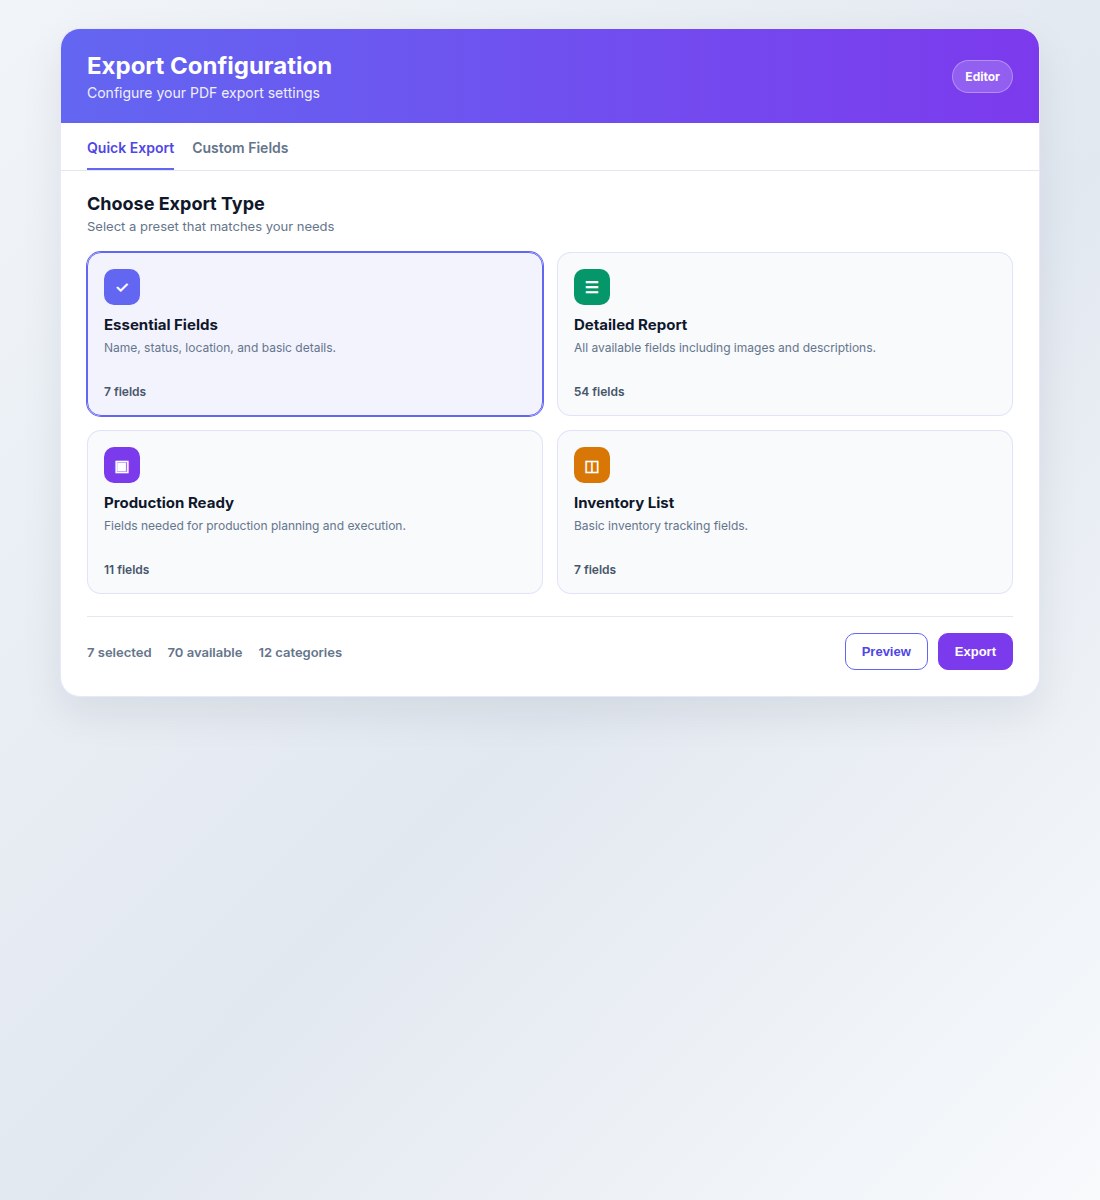
Choose a preset:
Basic Overview — essential fields
Detailed Inventory — full inventory pack
Show Ready — production execution
Transport & Logistics — shipping/handling focus
Financial Report — budget/cost focus
Optionally customise fields, branding (Branding tab on this page, or Branding Studio at /branding), images, QR, title page, portrait/landscape
Preview, then export
PDF export presets and options for packs from your live digital props bible
You can also download CSV from Props Inventory for spreadsheet workflows.
Watch out
Import without a selected show fails. Status and source words in spreadsheets may not match the create-prop dropdown exactly — map columns and review the preview before confirming.
Hire Sheet
Why this matters
Stage management needs one list of hired and rented props with return dates, couriers, and costs — not a hunt through individual prop records in the last week of tech.
Open the hire sheet
Select a show
Open Hire Sheet in the sidebar (/props/hire-sheet)
On Android, open Hire Sheet from the show or props tools (it is not a bottom-tab item)
The sheet lists hired/rented items grouped by hire company, with quantity, order ref, delivery, return date (overdue highlighted), return method, return address, location, and notes. Cost columns appear for props supervisors, stage managers, art directors, and admins.
Filter and export
Filter by hire company, return method (Company collects, Show arranges courier, Return to depot, Other), or Overdue returns only
Download CSV or Download PDF for stage management and returns
Return methods and company details come from the Hired source fields on each prop (and store return defaults when the item was hired from a Props Store).
Tip: Keep hire company, return date, and return method filled in on hired props so the sheet is useful before load-out, not after.
Watch out
A show must be selected. Items only appear if source is hired or rented. Empty hire sheets usually mean the props were saved as Bought or Borrowed instead.
Delivery Tracking
Why this matters
Theatre productions juggle dozens of deliveries — props arriving from retailers, packages going to and from venues, hired items returning to suppliers. Without a single view, deliveries slip through the cracks, tracking numbers live in emails, and crews chase updates instead of building shows.
The Props List provides two dashboard widgets for delivery visibility: Delivery List for props on order, and Package Tracking for packing lists in transit. Props supervisors, admins, and god users see both by default; other roles can enable them from widget settings.
Delivery List — props on order
The Delivery List widget shows props with status On Order and an expected delivery date. Use it to see what is arriving and when.
Delivery List widget — props on order sorted by expected delivery date
What the widget shows
Prop name and image
Expected delivery date with countdown (Today, Tomorrow, In X days, or X days overdue)
Courier name when entered
Tracking number when entered
Color-coded urgency: red for overdue, orange for due within 3 days, yellow for due within a week
Add tracking info to a prop
Open a prop and choose Edit
Set status to On Order (or Awaiting delivery)
Fill in Expected Delivery Date, Courier, and Tracking Number in the delivery fields
Save — the prop now appears in the Delivery List widget
Package Tracking — packing lists in transit
The Package Tracking widget tracks packing lists (shipments) moving between show venues, rehearsal rooms, suppliers, makers, and storage. Unlike individual prop deliveries, package tracking follows containers of props through a full shipping lifecycle.
Package Tracking widget — shipments with direction, status, and delivery dates
Shipment statuses
PendingShipment created but not yet dispatched
DispatchedHanded to courier or left origin address
In TransitOn the way — shipped date is set
ArrivedReceived at destination
DelayedExpected delivery date passed without arrival (auto-detected)
LostManually marked as lost
Quick actions
From the widget, use the icon buttons on each package row:
Mark as Shipped (truck icon) — sets shipped date to now
Mark as Arrived (check icon) — sets arrived date and clears lost status
Mark as Lost (alert icon) — flags the package as lost
Edit (pencil icon) — opens the full tracking details modal
Edit tracking details — dispatch, shipped, expected delivery, arrived dates and times, courier, tracking number
Set up shipping on a packing list
Open a packing list
Go to the Delivery Details tab
Set From Address and To Address (must match addresses associated with the show — venues, rehearsal spaces, or storage)
Enter Dispatch Date, Expected Delivery Date, Courier Name, and Tracking Number
Save — the packing list now appears in the Package Tracking widget
The widget automatically detects direction (incoming or outgoing) based on whether the destination or origin matches your show addresses.
Enable the widgets
Props supervisors see Delivery List and Package Tracking by default. To enable them on other roles:
On the Home dashboard, click the Widgets gear icon
Find Delivery List and Package Tracking in the disabled list
Click to enable, then drag to reorder
Tip: Set expected delivery dates on props even if approximate. The widget highlights overdue items automatically, so a rough date is better than no date.
Watch out
Package Tracking requires addresses associated with the show (venues, rehearsal spaces, storage). If a packing list does not appear, check that its from/to addresses are linked to the show in Show Management.
Billing, pause, cancel, and your data
Manage this from Profile → Subscription on the web app or the Subscription tab on Android.
Pause
Use Pause account. Pause stops future payments. You do not need to archive or delete shows. We keep paused-account data for 90 days, then delete it unless you resume with Resume account.
Downgrade
If you have more shows than the new plan allows (for example 10 shows on Standard going to Starter’s 3), archive or delete the extras first. We will not delete them for you. The lower price starts at the next billing date. Use View All Plans to compare.
Add-ons
You can add or remove add-ons on Standard and Pro. Removing an add-on with Remove at period end keeps it until the end of the period you have already paid for. It is not charged again after that date. Card and address changes use Manage Billing (Stripe portal).
Cancel
Use Cancel subscription at any time. You keep access until the end of the period you already paid for. After that, no further payments are taken. We keep your data for 90 days so you can download it, then delete it.
How we give you the data
Use Download my data. We generate a JSON file (profile, shows, props, packing lists, boards, stores) and also email a download link that stays valid for 7 days.
Hire houses and props stores need permanent stock tracked separately from show lists. A store catalogue with locations, rates, and enquiries turns idle inventory into hire income between productions while keeping ownership clear.
Create and configure a store
Open Props Stores (/stores)
Create a store and set Catalogue visibility:
Private — store team only
Public — listed on the website catalogue (contact email required for hire enquiries)
Add store team with roles: Store owner, Store manager, Store staff
Browse public catalogues from the stores area or the website Props for Hire page when you are hiring in
Print location and container labels
Open the store → Labels — this is the print-labels area
Location labels cover rooms, racks, and shelves. Container labels cover locations whose type is Box / container
Print one label or print a whole group. Choose A4 sheet or sticker-printer stock (Brother, Dymo, 4×6″)
Stick the label on the rack or crate. Scan it to open a live list of props currently assigned there (/sl/{locationId})
Print individual prop QR labels from Inventory or the prop detail page (/sp/{propId})
Catalogue items
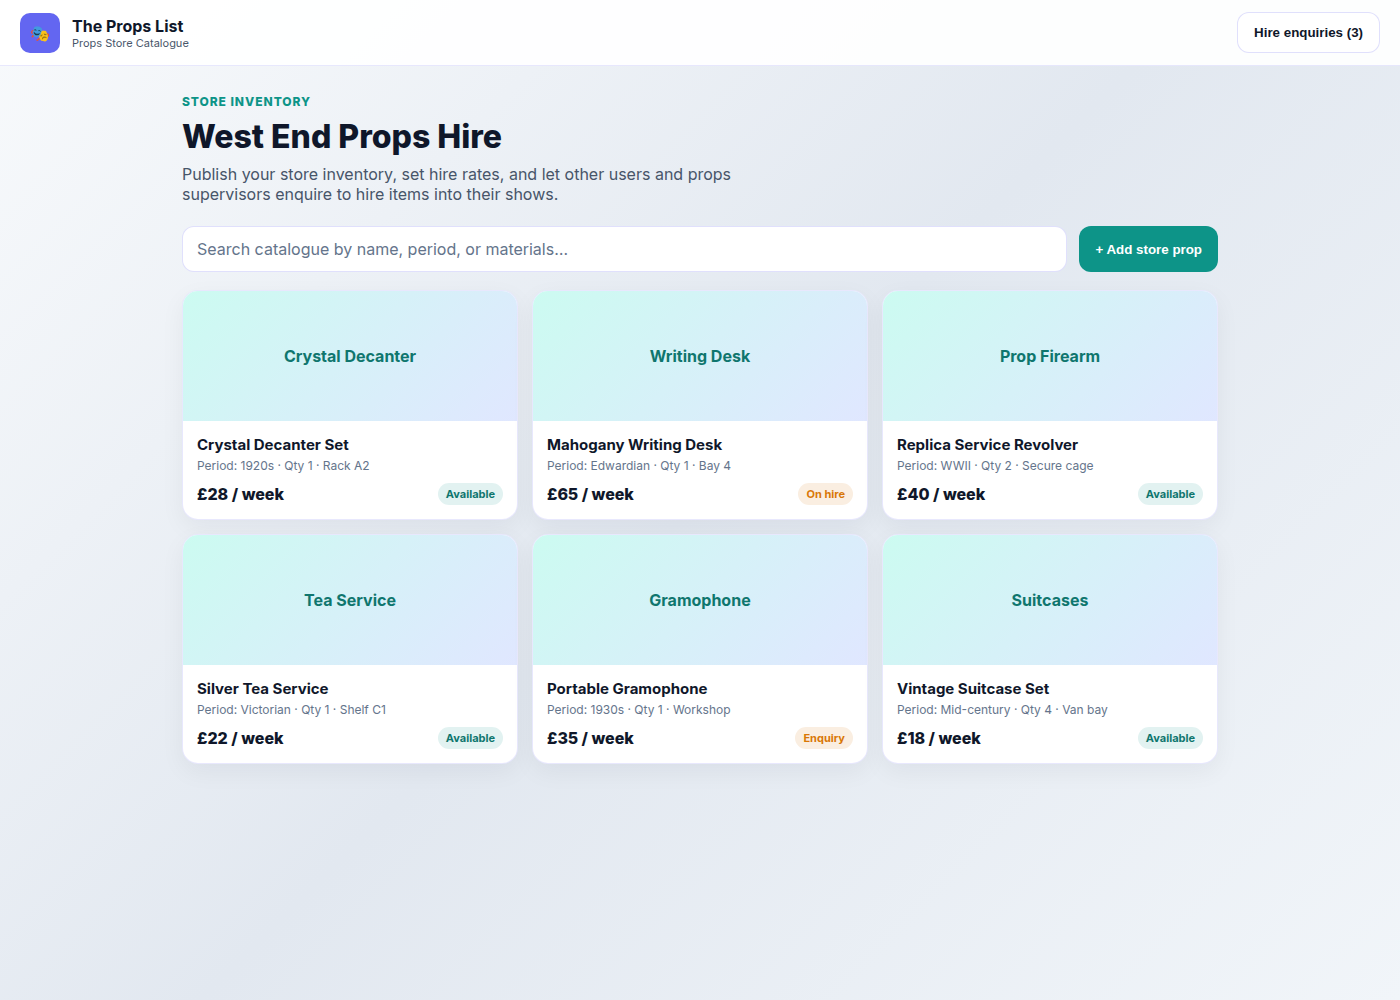
On a store prop you can set photos, name, description, category, status (Available, On hire, Reserved, Maintenance, Retired), period, origin, condition, tags, materials, associated shows, quantities (total / available / on hire), location notes (room, rack, shelf, box), shelf/box labels, and pricing (fixed weekly rate or quote on request, weekly hire rate, replacement value, min hire days, notes).
Store catalogue with weekly hire rates and availability
Hire enquiry flow
Hirer browses catalogue → Request to hire
Form: name, email, quantity, needed-from / until dates, optional show ID, message → Send enquiry
Store receives the enquiry → Accept & send (pick target show — creates a show prop linked back) or Decline
Statuses move through pending, accepted, declined, fulfilled, cancelled
Tip: Keep store stock separate from show props. Accepted hires should land in the production list while still tracing back to the store record.
Open beta: Props Store is a £19/mo add-on on Standard or Pro (from £38/mo including the plan, not £19 all-in). Free and Starter must upgrade the plan first, then purchase the add-on. Use it when permanent stock should earn hire income between shows.
Mobile App
Why this matters
Props work happens in stores, workshops, and venues — not only at a desk. Mobile keeps the same live data in your pocket so photos, status updates, packing scans, and task changes happen next to the item.
What mobile is built for
The Props List includes an Android app (same account and live data as web), with iOS in the pipeline. It is designed offline-first so changes sync when you are back online. Plan on the desk; capture on the floor.
Bottom tabs: Home, Taskboard, Props, Shows, Packing, Help, Profile. Shopping, Hire Sheet, and Props Stores open from those areas rather than the tab bar.
Browse props, shows, packing lists, shopping, and task boards
Add props and take photos with the device camera
Scan container QR codes during load-in and touring
Update prop and task status without a desk computer
Get notified when tasks are assigned or important changes need attention
Use in-app help and feedback from the mobile tabs; full how-tos stay on this page
Web vs mobile — who does what
Stronger on web
CSV import, PDF props bible export, public packing links, deep show edit/archive, team admin, store accept/decline, branding.
Stronger on mobile
Camera capture, floor status updates, packing find/scan, biometrics, offline-first workshop use.
Sign in on mobile with the same account as the web app
Edit tasks, due dates, and comments from your phone
Mobile troubleshooting
Props missingCheck the show filter / selected show
Photos failKeep files under about 5MB or compress before upload
Team accessAccept the email invite and create/sign in with that address
Open beta: Android is available now; iOS is in the pipeline. Start free or contact us with questions.
Still Need Help?
Can't find what you're looking for? Our support team is ready to help. During beta you can report bugs from this site — attach a screenshot if it is a display issue — or, once signed in, from the in-app feedback form.